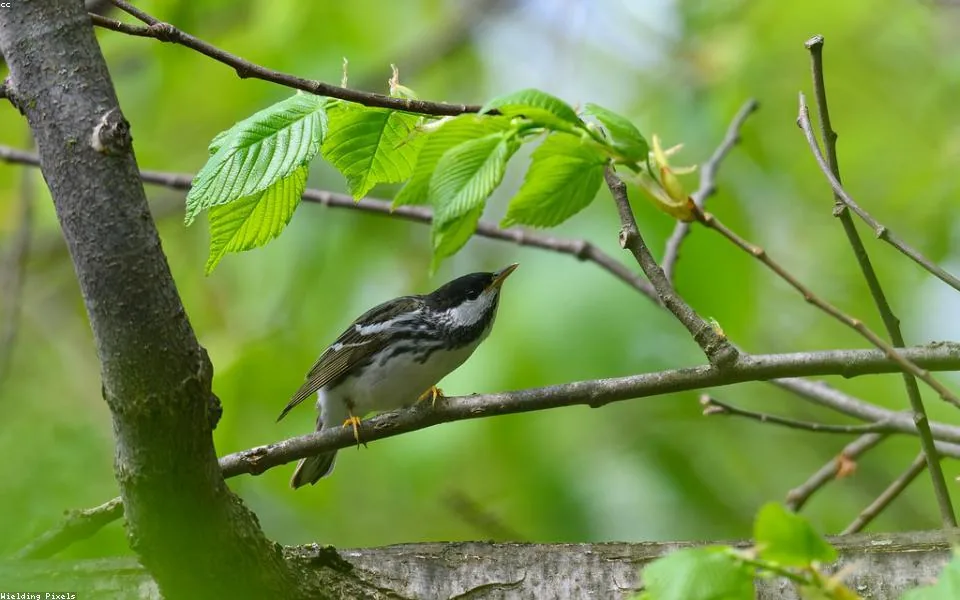
Getting sharp, well-exposed shots of birds is harder than it looks. A chickadee at a feeder sits still for maybe two seconds; a great blue heron takes off with zero warning. The right equipment does not guarantee great photos, but the wrong equipment guarantees missed ones.
Why Gear Choices Matter More for Birds Than for Other Wildlife
Birds move faster than most wildlife subjects, they are often small against large backgrounds, and they rarely cooperate with your autofocus. A lens that performs perfectly on a still landscape will hunt and miss on a pine warbler flicking through branches. Shutter speed, autofocus tracking speed, and reach all compound together — one weak link breaks the shot.
Canadian conditions add specific pressure: frost on optics in Quebec winters, humidity in BC coastal forests, and high UV glare over prairie wetlands in June. Weathersealing is not a luxury here.
Cameras: What to Actually Look For
Do not buy a camera based on megapixels alone. For birds in flight, the three specs that matter most are:
- Burst rate (frames per second) — 10 fps is a minimum, 20+ fps is better
- Autofocus subject tracking — bird-eye AF, available on most mirrorless systems since 2022, is now standard and genuinely useful
- Buffer depth — how many frames the camera can shoot before slowing down; relevant when a shorebird flock lifts off and you have 4 seconds of action
Current Camera Categories
| Category | Example Models (2026) | Burst Rate | Best For |
|---|---|---|---|
| Entry mirrorless | Sony a6700, Fujifilm X-S20 | 11–30 fps | Backyard, feeders, static subjects |
| Mid-range full-frame | Nikon Z6 III, Canon R6 Mark III | 20–40 fps | Most field situations |
| High-end full-frame | Sony a1 II, Canon R3 | 30–120 fps | Flight, fast shorebirds |
| Micro Four Thirds | OM System OM-5, Panasonic G9 II | 25–60 fps | Travel, hiking, weight-sensitive |
Micro Four Thirds bodies deserve more credit than they get among bird photographers. The 2x crop factor means a 300mm lens gives 600mm equivalent reach — a real advantage for small passerines, and the bodies weigh roughly half what a full-frame setup does.
Lenses: The Most Important Decision
If you are choosing between a better camera and a better lens, buy the lens. Optical quality, maximum aperture, and focal length directly determine whether you can shoot at a useful shutter speed in woodland light.
Focal Length by Situation
| Situation | Minimum Useful Focal Length | Notes |
|---|---|---|
| Backyard feeders | 200mm | Bird fills enough of the frame at 3–5m |
| Forest birding (Quebec) | 400mm | Birds rarely approach close, foliage blocks light |
| Shorebird flats | 500–600mm | Subjects are distant, heat shimmer is a factor |
| Ducks on open water | 300–400mm | Depending on how approachable the birds are |
| Birds in flight | 400–600mm | Fast AF more important than reach here |
Lens Options by Budget
Under $1,500 CAD
- Canon RF 100-400mm f/5.6-8: Compact, sharp, works well in good light
- Nikon Z 100-400mm f/4.5-5.6 S: Better in low light, significantly heavier
- Sigma 100-400mm f/5-6.3 (various mounts): Widely available used
$1,500–$4,000 CAD
- Sony 200-600mm f/5.6-6.3 G: Outstanding reach-to-price ratio, weather-sealed
- Fujifilm XF 150-600mm f/5.6-8: Excellent on APS-C bodies, sharp across the range
- OM System 150-600mm f/5-6.3: Spectacular for Micro Four Thirds users
Above $4,000 CAD
- Canon RF 600mm f/4 L IS: Used by professional wildlife photographers, noticeably better in low light
- Nikon Z 600mm f/6.3 PF: Lightweight for the focal length, good option for birders who walk long distances
- Sony 300mm f/2.8 GM: If you photograph birds in dim forest light regularly, f/2.8 at 300mm is transformative
One underrated option: teleconverters. A 1.4x TC added to a 400mm f/5.6 gives 560mm at f/8 — still workable in open light and far cheaper than buying a longer lens.
Tripods and Support Systems
Hand-holding a 500mm lens while tracking a bird in flight is possible and often necessary. But for dawn shoots at a marsh, a support system reduces fatigue significantly and keeps your composition consistent while you wait.
Tripod heads for birds:
- Ball heads work for static subjects and quick repositioning; not ideal for panning flight shots
- Gimbal heads (Jobu Design, Wimberley V2) are the standard for long telephoto lenses on birds in flight; they balance the lens and allow free movement in any direction
- Fluid video heads give smooth pan for birds crossing the frame
Carbon fibre tripods are worth the price difference if you carry gear more than 2km. A steel tripod that you leave in the car because it is too heavy is less useful than a lighter one on your shoulder.
Alternatives to tripods:
- Monopods: Fast to set up, less stable, excellent for moving situations like woodland trails
- Bean bags: Underestimated. A bean bag on a car window mount is one of the most stable setups possible and birds often ignore cars as hides
Accessories Worth Carrying
Memory and Power
- Always carry two batteries; cold weather (below 5C) drops battery capacity by 20–40%
- Use fast UHS-II or CFexpress cards if your camera supports them; slow cards cause buffer bottlenecks
- A small USB-C power bank compatible with your camera's charging port is worth adding for full-day field trips
Camouflage and Approach
Most birds respond to shape more than colour. Breaking up the outline of a camera and lens with a lens coat or camouflage sleeve reduces flushing, particularly with wary species like bitterns and rails. This matters more than most photographers admit.
A collapsible hide (blind) is worth owning if you photograph at a regular location — a marsh edge, a known owl roost, a reliable woodpecker snag. The investment is around $80–$200 CAD and can be the difference between 10m and 3m subject distance.
Filters
- Circular polarizer: Reduces glare on water surface shots of ducks; reduces contrast in open sky conditions
- UV filter: Mainly protects the front element; optical quality has improved significantly in the $60–$100 range
- Do not use filters for flight photography — they cut light you cannot afford to lose
Field Settings to Start From
Settings vary by situation, but these starting points work for most daytime bird photography in Canadian conditions:
| Mode | Starting Value | Reason |
|---|---|---|
| Shutter speed | 1/1000s (perched), 1/2000s+ (flight) | Freezes motion; adjust up for fast species like swallows |
| Aperture | f/5.6–f/8 | Depth of field covers a moving bird; opens light |
| ISO | Auto, max 12800 | Modern sensors handle ISO 6400 cleanly; let camera adjust |
| AF mode | Continuous, subject tracking on | Bird-eye AF locks well on owls, herons, raptors; less reliable on small passerines in foliage |
| Burst | High | You keep 1 in 20; shoot 20 |
Shooting in RAW rather than JPEG gives significantly more latitude for exposure recovery, particularly in backlit situations — common when birds perch against open sky.
What to Prioritize at Each Budget Level
Starter kit (under $2,000 CAD total): A used mid-range mirrorless body (Sony a6600, OM System OM-5) plus a zoom in the 100–400mm range covers the majority of field situations. You will miss some shots in low light and some fast-action sequences. You will still get excellent images.
Intermediate kit ($2,000–$5,000 CAD): Full-frame or APS-C body with reliable bird-eye AF plus a 500–600mm zoom. This setup handles most conditions in Quebec forests, coastal BC, and prairie wetlands without significant compromise.
Advanced kit ($5,000+ CAD): High-burst full-frame body plus a prime telephoto (400mm f/4 or 600mm f/5.6 class) with a teleconverter option. The difference at this level is consistency in difficult light and with fast-moving species.
Frequently asked questions
What is the minimum focal length for photographing birds in a Quebec forest?
400mm on a full-frame or APS-C body is a practical minimum for woodland passerines. Quebec forests are dense and birds rarely allow close approach. A 300mm lens can work for species that come to feeders or water sources where you control the distance, but in mixed forest habitats you will find yourself consistently cropping and losing image quality.
Is Micro Four Thirds equipment good enough for serious bird photography?
Yes. The OM System OM-5 and OM-1 Mark II produce images competitive with APS-C and in some conditions full-frame systems, particularly for birds in flight in good to moderate light. The 2x crop factor gives practical reach that is difficult to match at the same weight. The tradeoff is higher noise above ISO 3200, which matters in shaded forest conditions in autumn and winter.
Do I need weathersealed gear for birding in Canada?
Strongly recommended, not optional. Morning dew on the St. Lawrence marshes, rain in coastal BC, and blowing snow in Alberta in April are all realistic shooting conditions. A body and lens without weathersealing can survive these situations, but the risk of moisture damage increases significantly. The cost difference between weathersealed and non-weathersealed options at the same performance level is usually $200–$600 CAD — worth it.
How much does autofocus quality actually matter for bird photography?
It is the single largest performance gap between entry and mid-range equipment. A camera that loses tracking lock when a bird moves behind a branch and fails to reacquire quickly will produce a much lower percentage of sharp images than one that reacquires in under half a second. Bird-eye AF on current Sony, Canon, Nikon, and OM System mirrorless bodies (2024–2026 generation) is genuinely reliable on medium to large birds. For small, fast, and partially obscured subjects like warblers in foliage, no current autofocus system is fully reliable — anticipation and manual AF adjustment still matter.